How to Send Client Intake Form for Signature via Dropbox Sign
Overview
Use this process to send the Client Intake Form to clients and caregivers for electronic signature using Dropbox Sign. The system automatically sends the form in the client's primary language (English or Spanish) and saves the signed document in the client's record.
Before You Start
- Client record must exist in Lumary
- Client's email address must be on file
- Client's primary language preference should be set in their contact record
Step 1: Open the Client Contact Record
- Navigate to Contacts in Lumary ABA
- Search for and open the client's contact record
Step 2: Click the "Send Signature Document" Dropdown Arrow
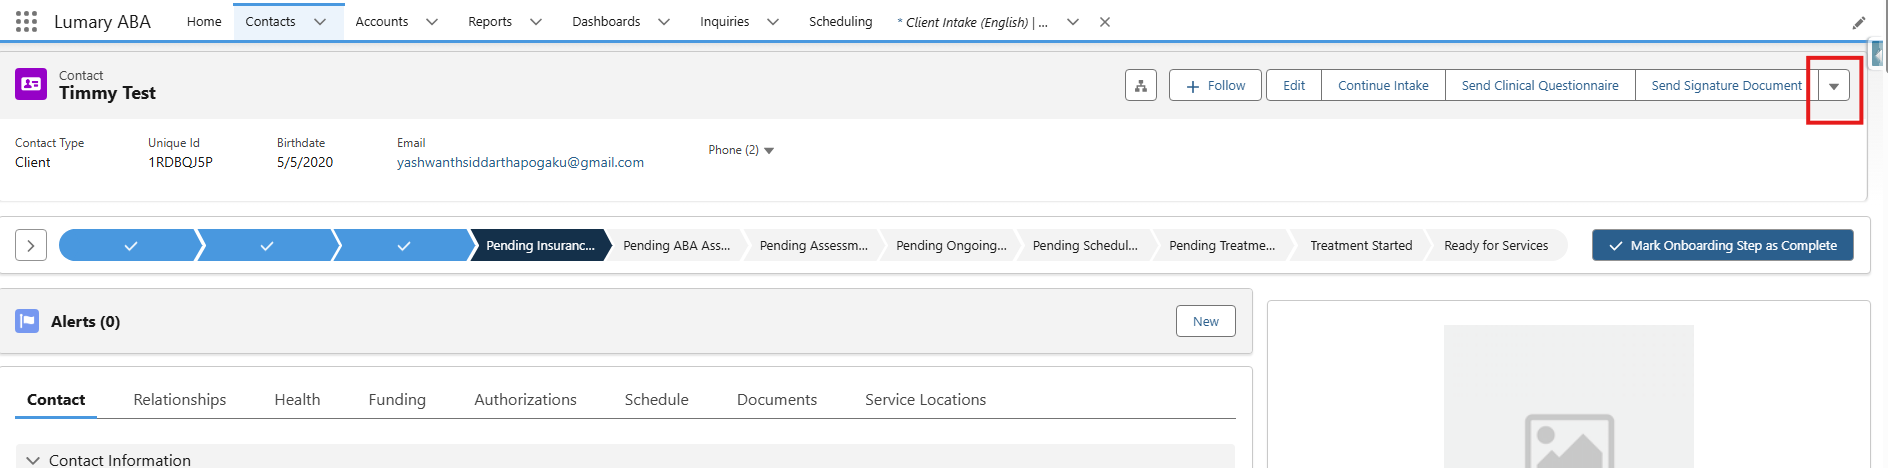
- On the client's contact page, look for the action buttons in the top right corner
- Find the "Send Signature Document" button with the down arrow (▼) next to it
- Click the down arrow (▼) — NOT the main button text
This opens a dropdown menu with available signature options.
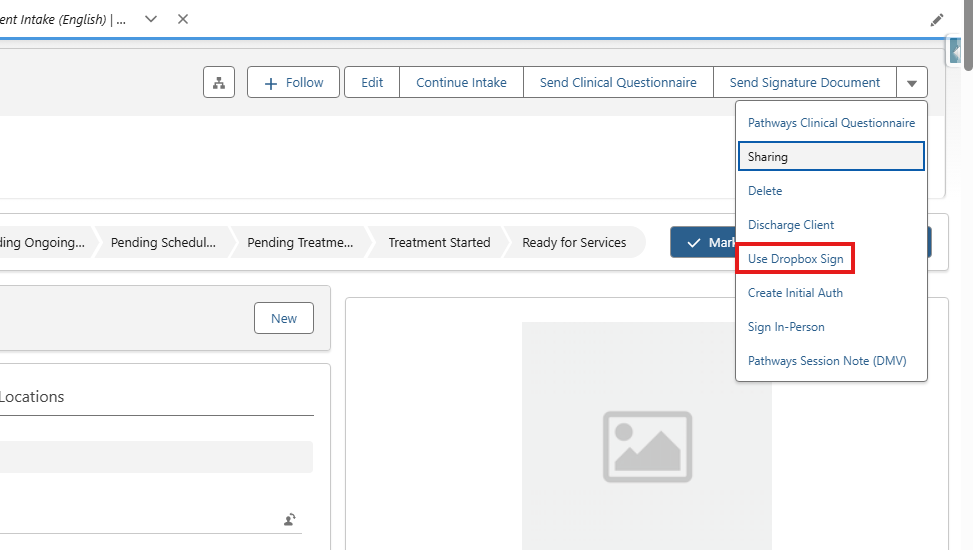
Step 3: Select "Use Dropbox Sign"
- From the dropdown menu, click "Use Dropbox Sign"
- The system will automatically launch the signature workflow
Step 4: Select a Document Template
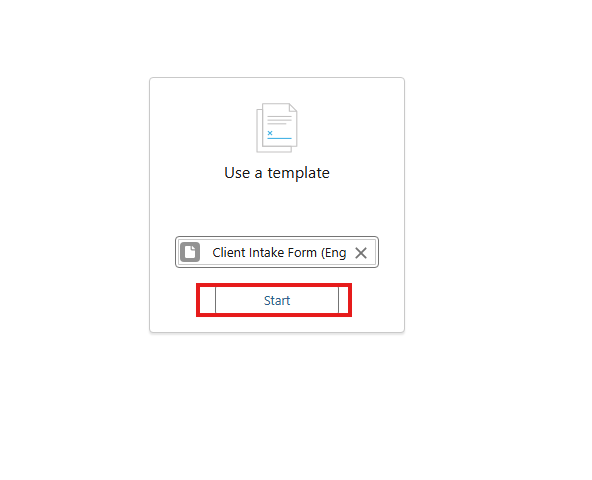
- A modal window appears titled "Use a template"
- Search for "Client Intake Form" in the template list
- Select the appropriate language version based on the client's primary language:
- English: "Client Intake Form (Eng)"
- Spanish: "Client Intake Form (Spanish)"
- Or other language if applicable
- Click "Start" to proceed with the selected template
Step 5: Configure Recipients and Message
The signature configuration page displays four main sections:
Template
- Shows the selected template name
- Example: "Client Intake Form (English)"
Files
- Displays the PDF document that will be sent for signature
- File details include date created, file size, and format (PDF)
- Example: "Client Intake Form" (6/11/2026, 2:47 PM • 665.67 KB)
Recipients
This section determines who signs the document:
| Field | Description |
|---|---|
| Role | The signer's role (e.g., Caregiver, Client) |
| Type | Contact type selector—choose "Contact" to pull from your Lumary contacts |
| Recipient | The specific person signing the document (selected from your contacts) |
| Action | The required action (e.g., "Sign") |
Message
Two message fields appear:
- Subject Line (pre-filled)
- Example: "Client Intake (English)"
- This is the email subject line the recipient receives
- Message for Recipient(s) (optional)
- Add custom instructions or context
-
Example: "Please complete and sign the intake form by [date]"
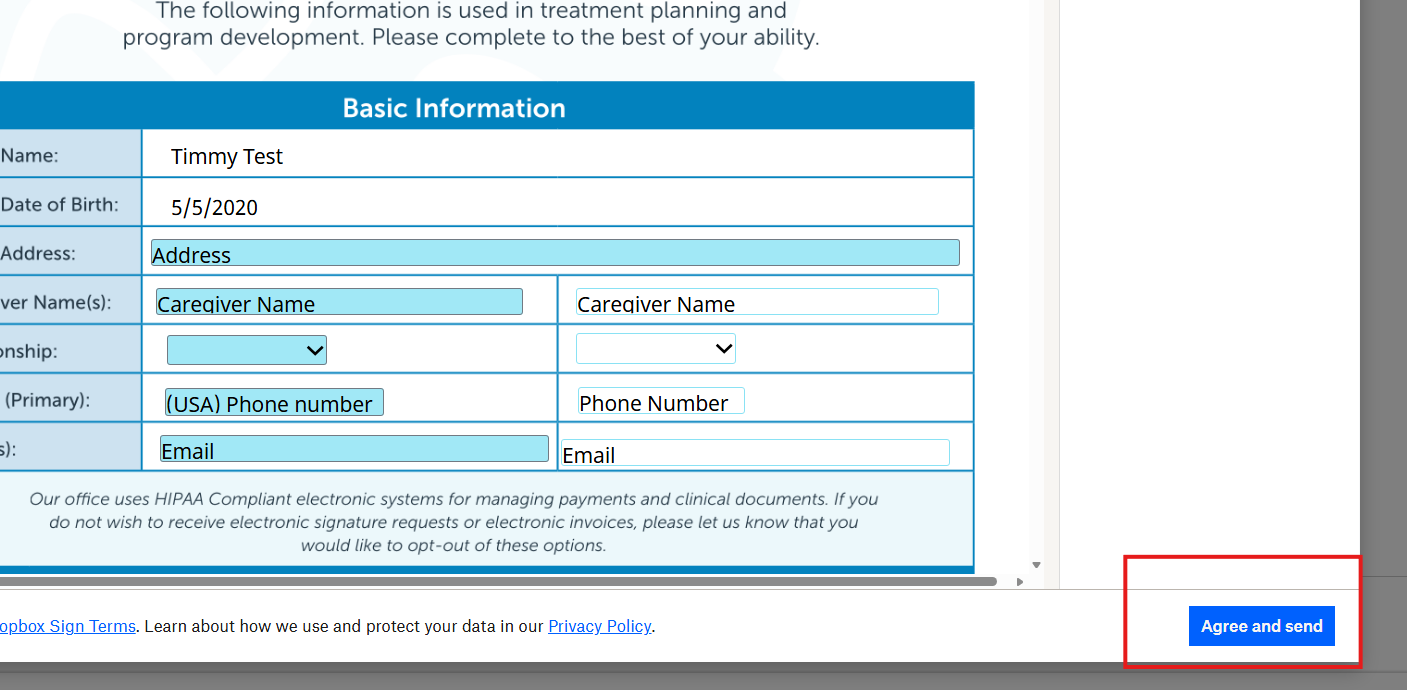
Step 6: Preview Document and Send
- Step 6.1 - Preview Document
- After configuring recipients and message in Step 5, review the document preview
- Verify:
- Client Name is correct (e.g., "Timmy Test")
- Client Date of Birth is correct (e.g., "5/5/2020")
- All pre-filled information is accurate
- Make any final adjustments to recipients or message if needed
- Step 6.2 - Agree and Send
- Click the blue "Agree and send" button
- The system sends the Client Intake Form to the recipient's email
Step 7: Access the Signed Document
-
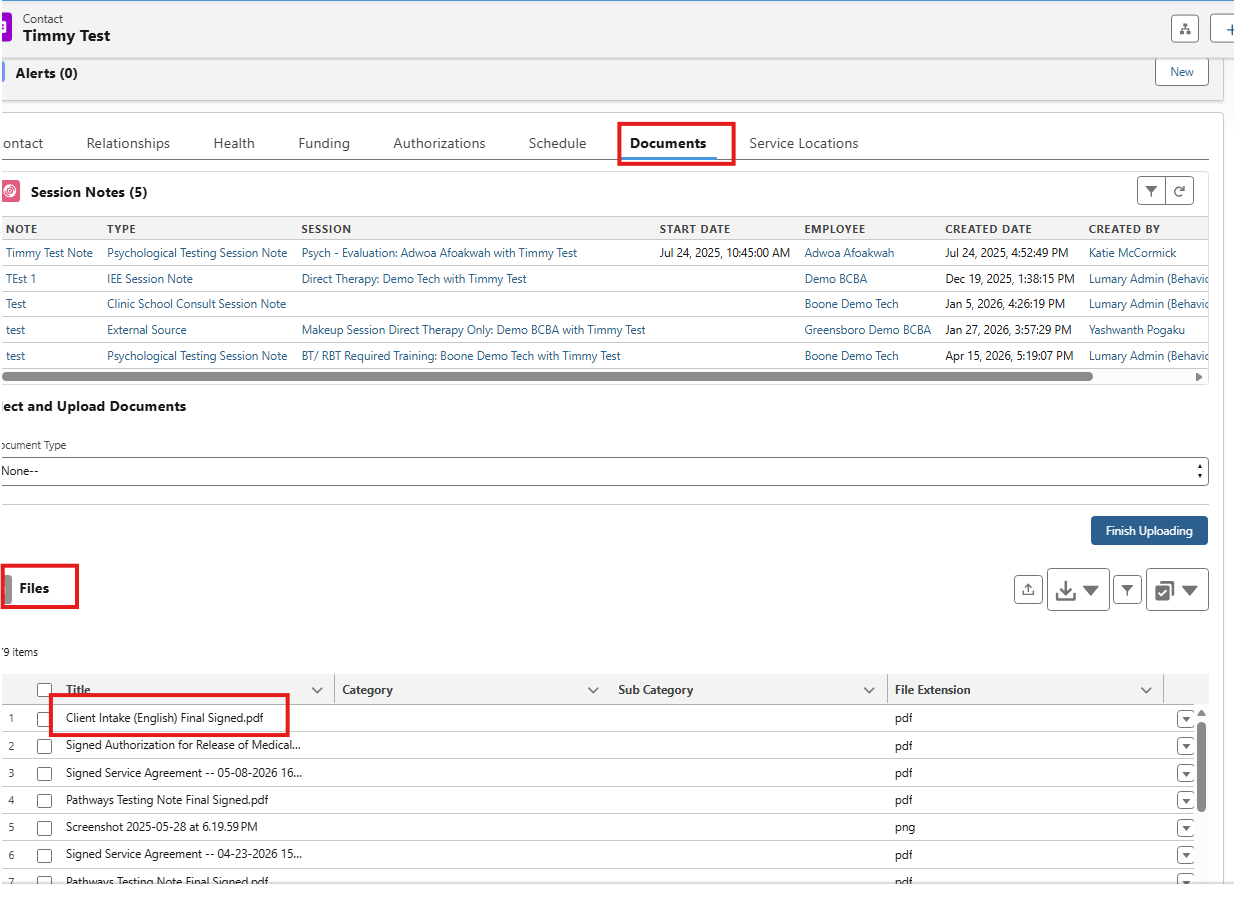
Once the document is signed, it is automatically saved in Lumary's Documents tab:
Location:
Client Contact Record → Documents tab → Files section
Document Naming:
Signed documents are named with the template name + "Final Signed"
Example: "Client Intake (English) Final Signed.pdf"
Finding Your Document:
- Open the client's contact record
- Click the Documents tab
- Locate the signed document in the Files list
- Documents are typically listed by:
- Title (sorted alphabetically by default)
- Category (if categorized by document type)
- Sub Category (if further organized)
- File Extension (PDF, etc.)
- The signed document can now be used for your records, shared with team members, or printed as needed.